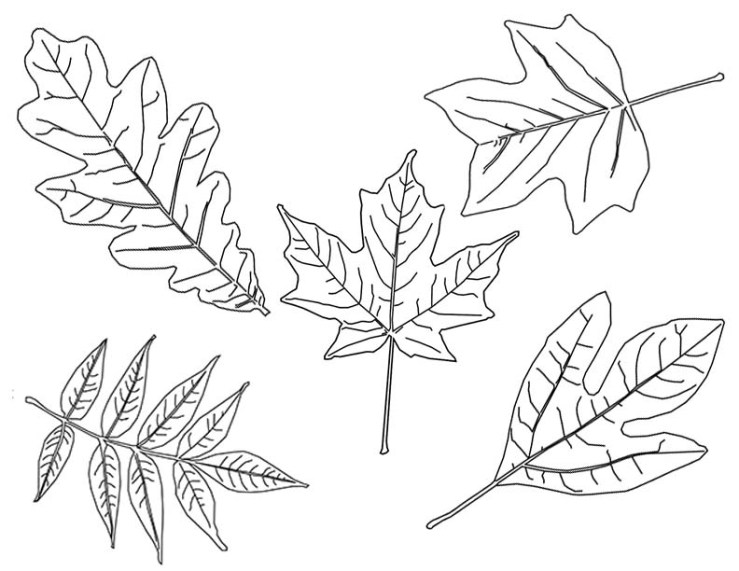
Ashley and I kept working alongside on our textile projects. Ashley continued weaving and I worked on creating smaller image targets for a soft mvp quilt. I decided to hold off on the bottlebrush buckeye and think of another for the future.
Depending on ability to build out collections digitally, may only focus on 1-3 species for first stages, but for now drew out space for 6, 5 drawn and 1 held for a new species. I layered the images in photoshop to make one printable stencil. Tracing on the muslin with the image underneath, first in pencil to mark/ brainstorm positioning, and then after all after positioned, filled in with sharpie.
Original hello world test – plane detection & point cloud
For this week we were to explore using AR Foundation and augment urban space. I was able to get the class hello world example to my phone with Rui’s help and a couple other tests but wasn’t quite able to get at my initial ideas. ❤ Maybe after office hours tomorrow : )
Things i looked into:
= Multiple image trackers, reference libraries and mutable reference libraries
Wanted to augment the sonic space with subway train logo markers. Where if it recognizes the signage and starts playing various songs written about the NYC trains, like Tom Waits’ Downtown train or Beastie Boys Stop That Train.
Was able to get it to the stage where it recognized my images in the reference library, next steps would be to have it trigger audio once tracked.
Hey everyone, in case there is any confusion, your controller should have a single binding to the Signal and your visualizer should take a single input argument of Signal.
e.g. To use Bob’s controller and visualizer a example ContentView would look like:
import SwiftUIstruct Signal {
    // Range: 0 - 10
    var intValue: Int    // Range: 0 - 1.0
    var floatValue: Float    // True or False
    var toggleValue: Bool
}struct ContentView: View {
    @State var signal = Signal(intValue: 0, floatValue: 0, toggleValue: false)    var body: some View {
        VStack {
            BobsController(signal: $signal)            Spacer()            BobsVisualizer(signal: signal)
        }
    }
}
You should not reformat the signal struct. You should be updating the values. Please refer to the cheat sheet if you need to review how to use a struct. (edited)
Requirements and Tips:
Views should be no larger than 400×400
If your views require image/audio/video assets, please send those along as well.
Be creative with your design. Think about how standard buttons and sliders can be mapped in fun and novel ways.
Consider using a timer and/or randomizer to modulate the signal over time.
You may or may not require some internal @State for your component views based on their complexity.
import SwiftUIstruct Signal {
    // Range: 0 - 10
    var intValue: Int    // Range: 0 - 1.0
    var floatValue: Float    // True or False
    var toggleValue: Bool
}struct ContentView: View {
    @State var signal = Signal(intValue: 0, floatValue: 0, toggleValue: false)    var body: some View {
        VStack {
            NiensController(signal: $signal)            Spacer()            NiensVisualizer(signal: signal)
        }
    }
}
A controller file with your name. e.g. NiensController.swift
struct NiensController: View {
    @Binding var signal: Signal    var body: some View {
        //
        // Add your buttons, knobs, etc. here.
        // Update signal appropriately.
        //        Text("Controller")
    }
}
A visualizer file with your name. e.g. NiensVisualizer.swift
struct NiensVisualizer: View {
    var signal: Signal    var body: some View {
        //
        // Create visuals/animations here.
        //        Text("Visualizer")
    }
}
After working through some examples / tutorials last night, I decided to sift back through the AR Tracked Image Manager documentation to see about the following:
multiple targets via an XRReferenceImageLibrary
encountered issues when sifting through the ARfoundation example via GitHub ❤ mostly worked though! Was having trouble showing the last 3 I added
dynamic + modifiable / mutable libraries in runtime
how to dynamically change the image library live via ios camera or camera roll (most likely through a MutableRuntimeReferenceImageLibrary)
Looking through the ARfoundation Trackables / ImageTracking Documentation:
AR Tracked Image Manager
The tracked image manager will create GameObjects for each detected image in the environment. Before an image can be detected, the manager must be instructed to look for a set of reference images compiled into a reference image library. Only images in this library will be detected
Reference Library
XRReferenceImageLibrary
RuntimeReferenceImageLibrary
A RuntimeReferenceImageLibrary is the runtime representation of an XRReferenceImageLibrary
Today I went to Coding Lab to troubleshoot the logic roadblocks I was having with last weeks homework. Vince helped walk me through how @State & @Bindings were working in the Mobile Lab Game Kit.
We specifically walked through how avatarPosition was working across views since its needed across all layers. He mentioned how part of the magic that SwiftUI allows us with this system is that when the code goes to $avatarPosition to update the state it won’t get stuck in an infinite / recursive loop.
We then took a look at my app concept of navigating over clouds to reveal cloud names. he suggested approaching it in 3 steps:
collisionObject
that you would need to change the let to a var to allow for flexibility in the target size / shape. With the change from the finite let to the versatile var, we can now target that the size variable would need to become 2 different variables: sizeHeight & sizeWidth since in the example the trigger is a square and only needed one dimension repeated twice.
contentView
Vince then walked me through the simple logic to toggle the background (shifting the color), and that the logic would be the same for switching out images. He created a helper function that is an if/else statement and then called it in the view. He also reiterated how you cannot declare a function inside a view, that view only wants to deal with things that make instant changes to the canvas. So where calling a function in view would shift the canvas, the process of declaring it doesn’t return anything, therefore would return an error if in view.
Thinking about restrictions in position ( >&< ) logic to create rollovers
that in the example we did in coding lab, we only restricted in 1 direction, in order to achieve a rollover would need to restrict in all directions
Our resident Ilana has been so incredibly helpful (see past post). Was able to get on ITP’s share apple developer account to help with app build limits & was able to finally get my personal one sorted as well ❤ Before office hours she mentioned to check out the next few things:
Be able to create an AR app that places an image on an image target.
Take a photo with your camera/access camera library and as you use the image target that image appears on it. (Try using the plugin)
Take multiple photos or choose multiple images and attach that to your image target.
Add two different image targets. Make that when you take it or select photo to add in your app you will have to ‘tag’ them to a specific image target. The user now will be able to see the specific tagged images in each one of the targets
This week we were to review the Cheat Sheet made by Nien & Sebastian. As well as create 1 controller that outputs a signal and 1 visualizer that processes the signal. “You can think of the controller as something with buttons, knobs, etc. and the visualizer will be like a processing sketch which updates based on the signal.”
Inspired by things like this:
Code Examples:
The signal will have 3 components contained in a struct. Note the allowed ranges:
struct Signal {
    // Range: 0 - 10
    var intValue: Int    // Range: 0 - 1.0
    var floatValue: Float    // True or False
    var toggleValue: Bool
}
The Main Tester code will look somethings like this:
import SwiftUIstruct Signal {
    // Range: 0 - 10
    var intValue: Int    // Range: 0 - 1.0
    var floatValue: Float    // True or False
    var toggleValue: Bool
}struct ContentView: View {
    @State var signal = Signal(intValue: 0, floatValue: 0, toggleValue: false)    var body: some View {
        VStack {
            NiensController(signal: $signal)            Spacer()            NiensVisualizer(signal: signal)
        }
        .frame(height: 700)
    }
}
Deliverables:
Before the start of next class, please Slack Sebastian and I directly with your 2 files and any required assets. We will take everyone’s controller and visualizer and wire it up to a master app allowing us to mix and match everyone’s components.
A controller file with your name. e.g. NiensController.swift
struct NiensController: View {
    @Binding var signal: Signal    var body: some View {
        //
        // Add your buttons, knobs, etc. here.
        // Update signal appropriately.
        //        Text("Controller")
    }
}
A visualizer file with your name. e.g. NiensVisualizer.swift
struct NiensVisualizer: View {
    var signal: Signal    var body: some View {
        //
        // Create visuals/animations here.
        //        Text("Visualizer")
    }
}
Some requirements and tips:
Views should be no larger than 400×400
If your views require image/audio/video assets, please send those along as well.
Be creative with your design. Think about how standard buttons and sliders can be mapped in fun and novel ways.
Consider using a timer and/or randomizer to modulate the signal over time.
You may or may not require some internal @State for your component views based on their complexity.
Cheat Sheet Concepts
Data Flow
– think of your Views as a function of State
– how your views express the relationship between your application’s data / info and how your user interface looks and behaves.
– Understanding how data flows through a view hierarchy is fundamental to understanding app development with swiftui