Midterm Project Idea


500px-Peppers_ghost_low_angle.jpg

peppers-ghost.gif

Pepper’s Ghost

My Halloween Midterm partner is the wonderful Jiwon Shin!  ❤ ❤ ❤  Initially we were inspired by the optical effect of a Pepper’s Ghost hologram .  After some super fun brainstorming (and some pepper’s ghost youtube watching), we landed on the idea of  using an accelerometer to sense if we’ve “shaken” ( tilted ) a bottle or not to help a trapped soul escape.We were very inspired by Yoko Ono’s exhibit “We are all water”

Continue reading “Midterm Project Idea”

ICM: Week 5 – Objects and Arrays


Cloud City 


Assignment

Arrays and objects allow you to do something new with your programs: keep track of user action over the course of your sketch’s execution. For this week’s assignment, create a sketch that takes advantage of your new skills. The sketch should allow the user to use clicks, key presses, etc. to add new elements to the scene (and potentially to remove them later). Your sketch should use an array of objects. (Using a constructor function or the class syntax is optional.)

Originally I was inspired by Allison Parrish’s example in the notes on Objects & Arrays


IMG_4216.jpg


  • Thinking about Arrays within Arrays (or really arrays as objects?)
    • Would like to comb back through code with an *objects & methods* approach:
    • When talking with classmate Jiwon Shin  we started talking about how i could add a deletion tool to my current sketch state (which pushed mouseDrag to an empty array when you drew with mouse down to create each cloud). She walked me through how I could push all of the point drawn with the mousePressed into an array that is then pushed into another array – essentially making cloud objects?


  • One issue I hit when deleting was the program would break if you hit the delete key too many times. When debugging it in the console, we noticed it would try to call a negative number from the array (which doesn’t exist), as a solution – limited the call number to positive numbers only. So no matter how many times you hit “c” the program will still only reference the array number 0, and add on as you draw more clouds.


  • it still breaks if you click without drawing something – it confuses the program, due to no information being pushed to one of the arrays?

Lab Review & Prototyping Tips


Prototyping Methods & Tips 

This week we watched videos about serial communication as well as videos to help us with the fabrication side of things. I learned lots of great tips from the past residents as well as excited to try both the acrylic enclosures and Tom Igoe’s idea of lasercutting mat board as a quick solution to keeping things organized in the prototype stage without sacrificing a week to build a box. Instead, it allows you to problem solve/user test in the interim – later developing a final box that best suits your project. I also had no idea you could twist wire like in Bendetta’s tip, and will take to heart what Luisa learned about wire flexibility and UI. Will make sure to use illustrator to help me imagine my UIs


I also really appreciated Tom’s ideas about how we have to shift our thinking when making interactive art – the idea to let the viewer / user interpret the work. [ Making Interactive Art: Set the Stage, Then Shut Up and Listen ]


Lab Review

This week I revisited some of the past labs, including Analog/Digital inputs & outputs. This Friday, in addition to meeting with my super fun mid-term partner  – I hope to continue to the lab review from this week, starting with Sensor testing into Serial communication labs. I also want to continue with the tone lab playing with FSRs + Flex sensors. Looking forward to the Programmable Air flyby this friday too 🙂 ❤


Shooting iBracadabra

Screen Shot 2018-10-03 at 1.05.55 PM.png

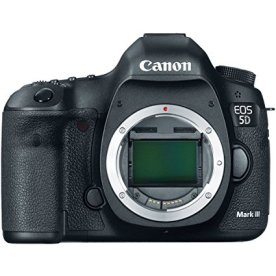
My group members Jaekook, Hayk and I shot footage for our iBracadabra video for Audio & video. It was a fun learning experience, as we learned a lot about trial and error with lighting, sound, camera settings and framing. We used the documentation area on the floor to shoot, which worked great from 8am to around noon but as you would anticipate became much louder with softlab sounds & students throughout the day.

I think we’ll have to try to incorporate the floor noise into it / blend it in with sound design maybe? To help with the floor noise, we ended up using the Sennheiser omnidirectional headset mic for our Stefan character.  We’ll need to make sure to split the audio into stereo & clean it while working with the rough cut.


71NdnTJZu8L._SX425_.jpgunnamed.png


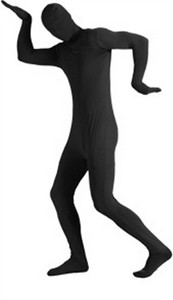
We ended up getting an all black puppeteer suit for our AI / SmartMagic character that performs all the magical functions. Characterizing the magic behind our technological black boxes


more soon ❤

adult-2nd-skin-black-body-suit.jpg

Continue reading “Shooting iBracadabra”

Lab 5: Tone Output Using an Arduino


Why not use analogWrite()?

When you use analogWrite() to create pulsewidth modulation (PWM) on an output pin, you can change the on-off ratio of the output (also known as the duty cycle) but not the frequency. If you have a speaker connected to an output pin running analogWrite(), you’ll get a changing loudness, but a constant tone. To change the tone, you need to change the frequency. The tone() command does this for you.


s-l1600.jpg  


(lower volume – very dissonant ❤ ❤  )